
Gods of Chaos - New Route on the East face of Mt Chaos
- Mason Gardener
- Mar 11, 2025
- 5 min read

Updated: Mar 13, 2025

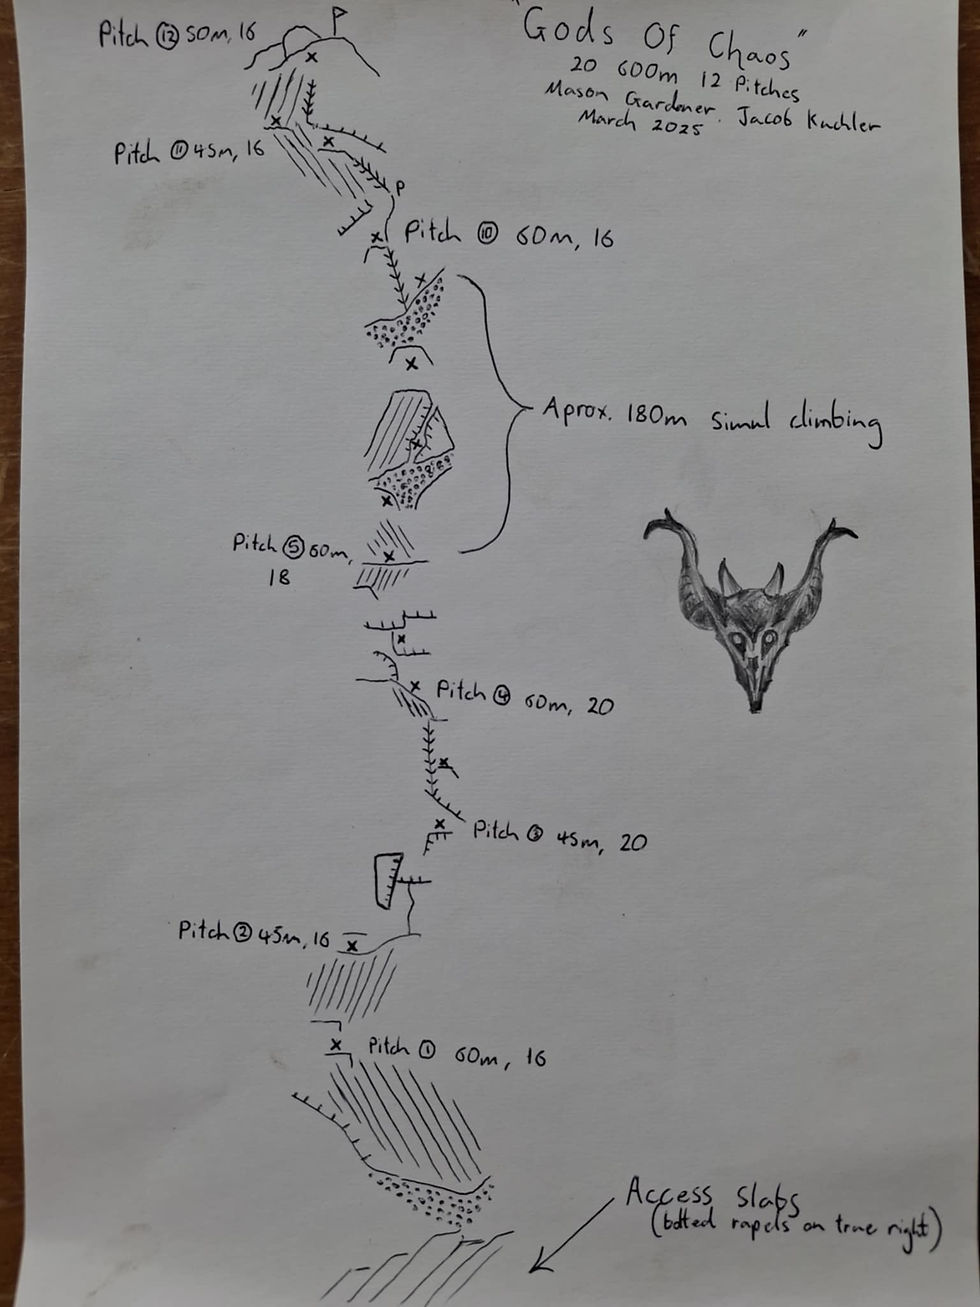
Gods of Chaos – 20, 650m, 12 Pitches
March 2025
Mason Gardener & Jacob Kuchler
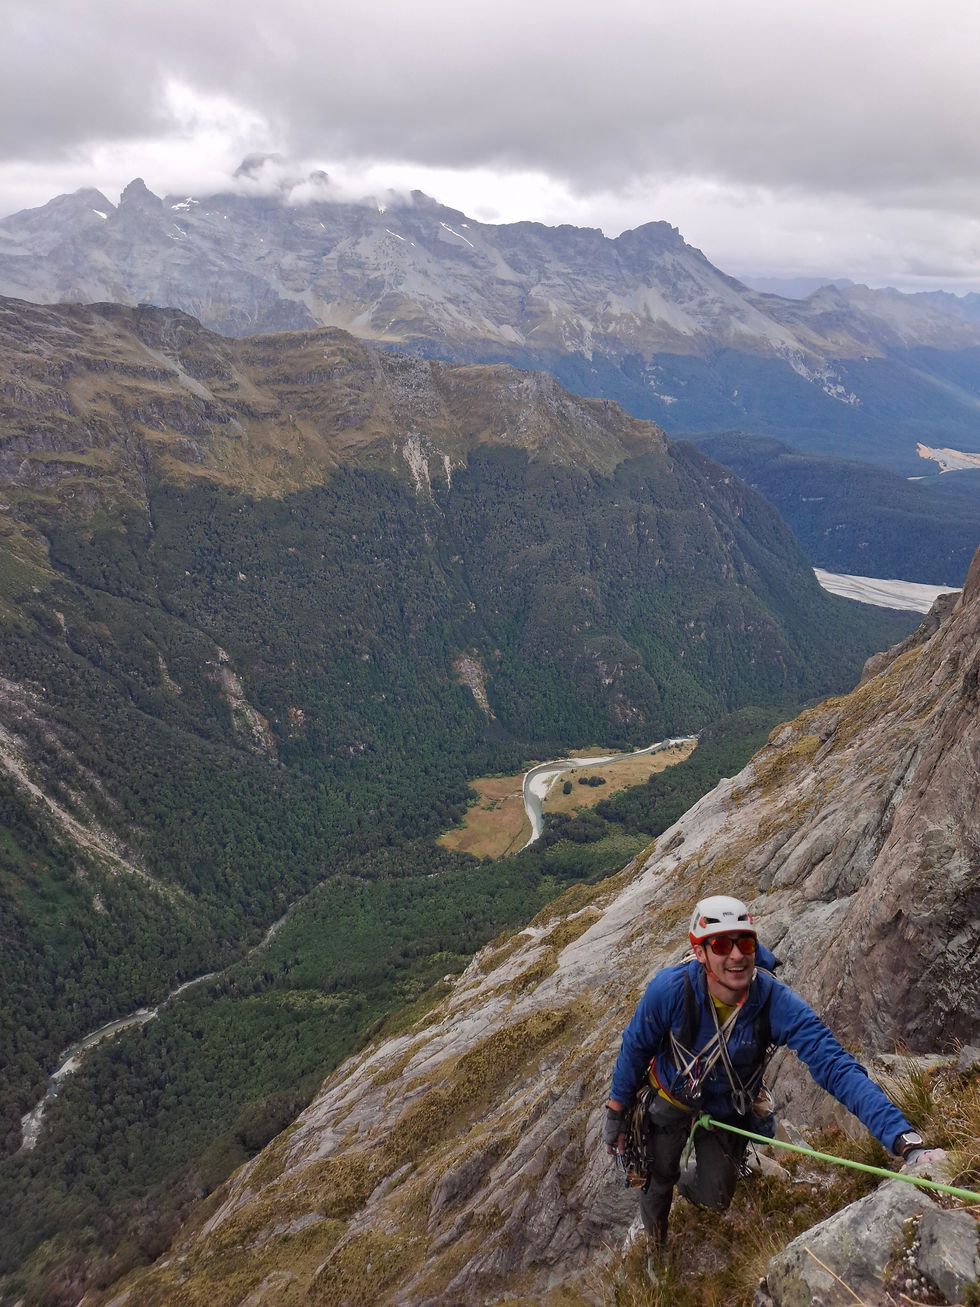
Mason Gardener and Jacob Kuchler have returned home after climbing and developing a new route on the spectacular east face of Mt Chaos. The party found some of the best quality schist either had climbed on and discussed in length of future prospects on this face. They climbed it in a pure alpine style from the car, and would highly recommend it to anyone wanting to test themselves on a fantastically unexplored piece of rock.
Approach
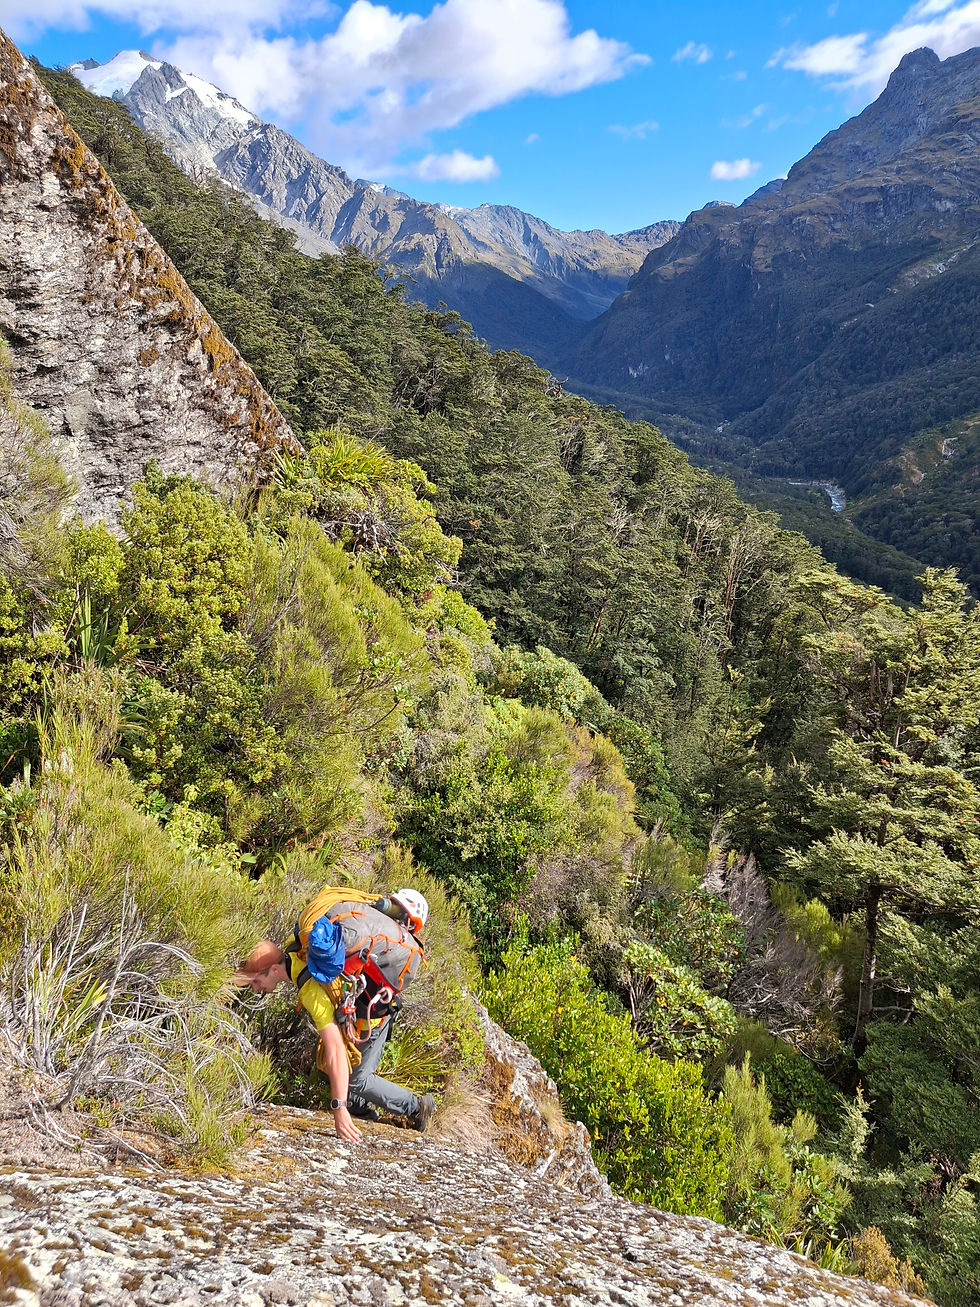
The pair left Chinaman’s bluff carpark at 6.30am. Initially strolling up the beans burn for about 1.5hr, past the creek turnoff to ‘Chaos theory’. The approach follows a stream bed which turns into a slabby romp. Shortly after, a series of wandering traverses are required to navigate big bluffs. Some bush bashing is required at times, but in general you make good time. 5hrs will get you to above the bush line where the gradient relents. From then on you can decide where best to set your bivy. We found a solid supply of water running down the entire access route, and a good stream at our bivy site marked on the map. We left our gear much lower than need be, you could instead climb a further 150m up the slabs to reach a more advanced site if you choose to.


Access to base of route
It is hard to tell from the map, but a significant cleft/gully splits Mt Chaos from its summit. The original route ‘Chaos theory’, climbs the lookers left most part of the mountain. Our route aimed to take on the summit directly.
Follow the stream up untill you reach a significant gravel ledge, just before the lower walls start to impose on you. From here begin climbing up and to your right following an obvious water runnel. The rock here is very water polished so may become impassible in spring. We soloed the bulk of this runnel until reaching a large overhanging chockstone. Here we roped up for a short move to then continue racing to the next ledge system. Once you reach the upper ledge there are three distinct lines which would go. We chose the middle option as it had the least ‘garden feel’ about it.
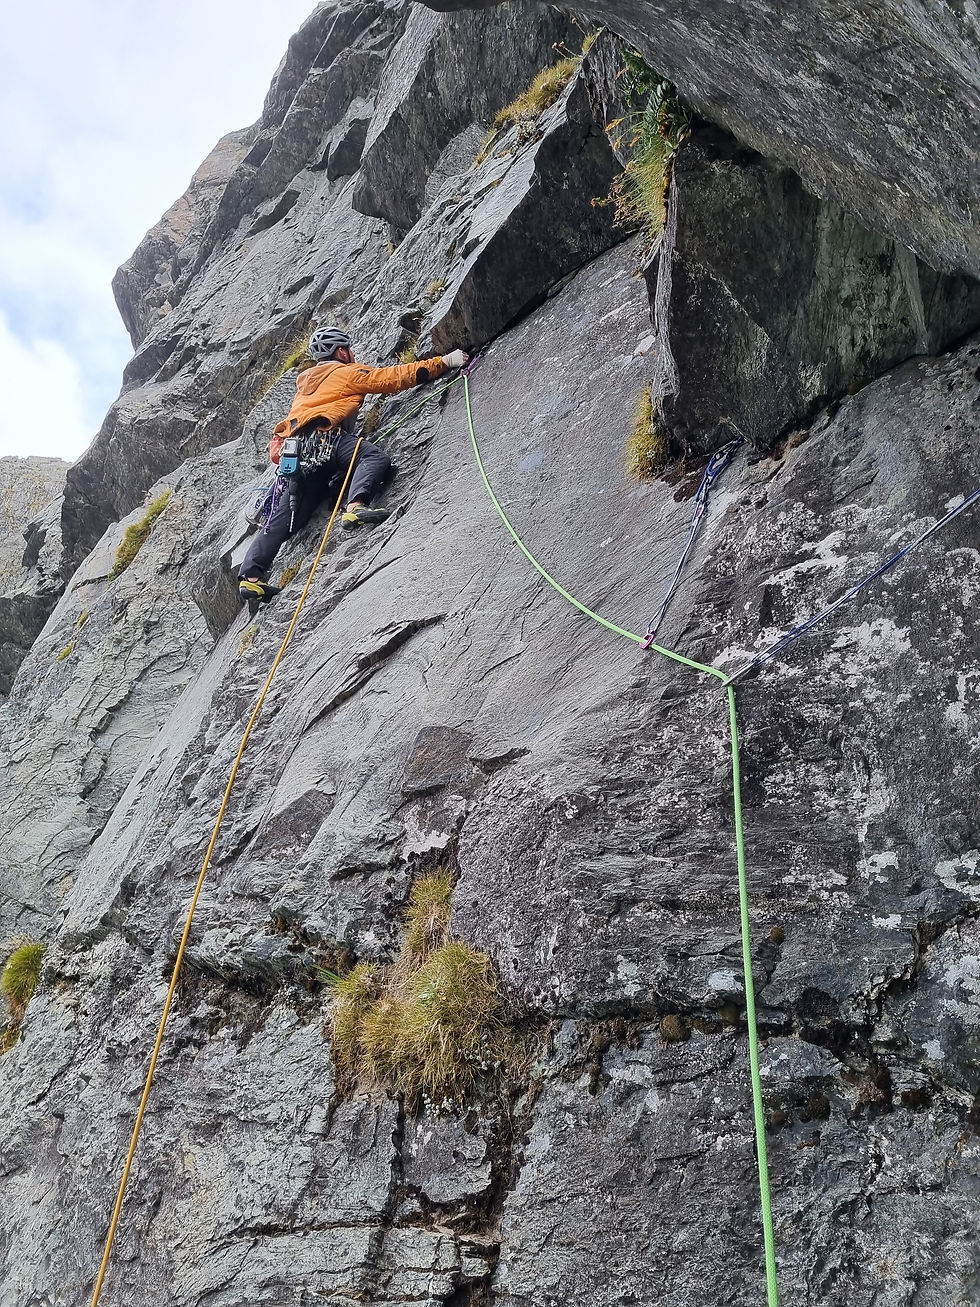
The climb
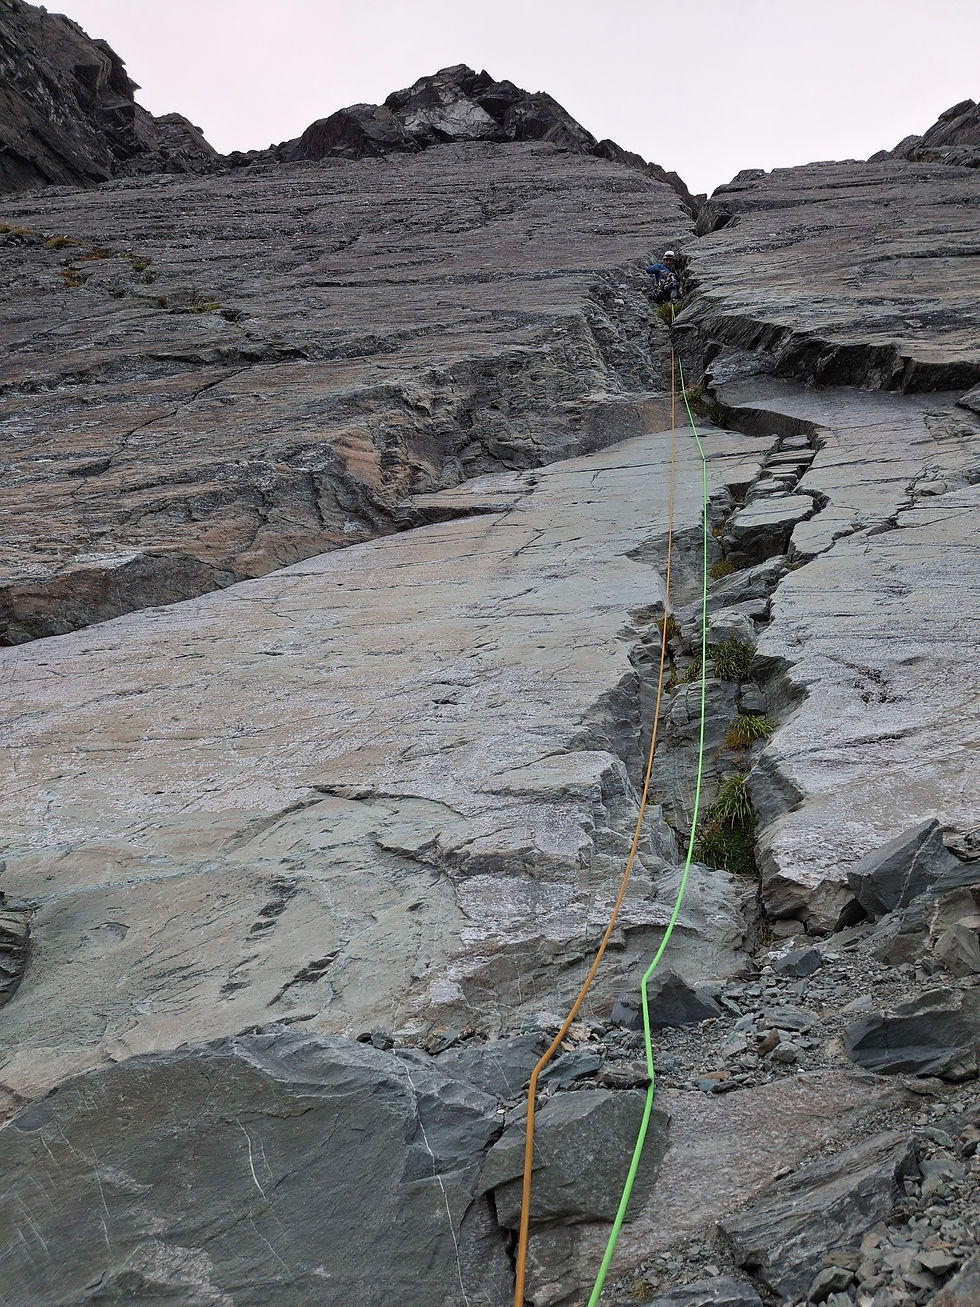
All pitches end at a single bolted belay.
P1 (16, 60m): Start on the right of significant overhang. Climb out and right finding sparse pro. Move back left to a gravelly ledge. You will find the bolt out left almost directly above where you started.
P2 (16, 50m): Move left across a ledge system for approximately 10m. Then wander your way up, aiming for a small roof. Belay down and right of the roof. From here on the rock quality improves drastically.
P3 (20, 45m): The seam pitch. From the belay climb up and left to locate some gear, then traverse back right for 10m along a grassy ledge (alternatively there is an unprotected slab move up and right of belay). Thin seam takes small cams and climbs really well. Belay under a small roof right of blank wall.
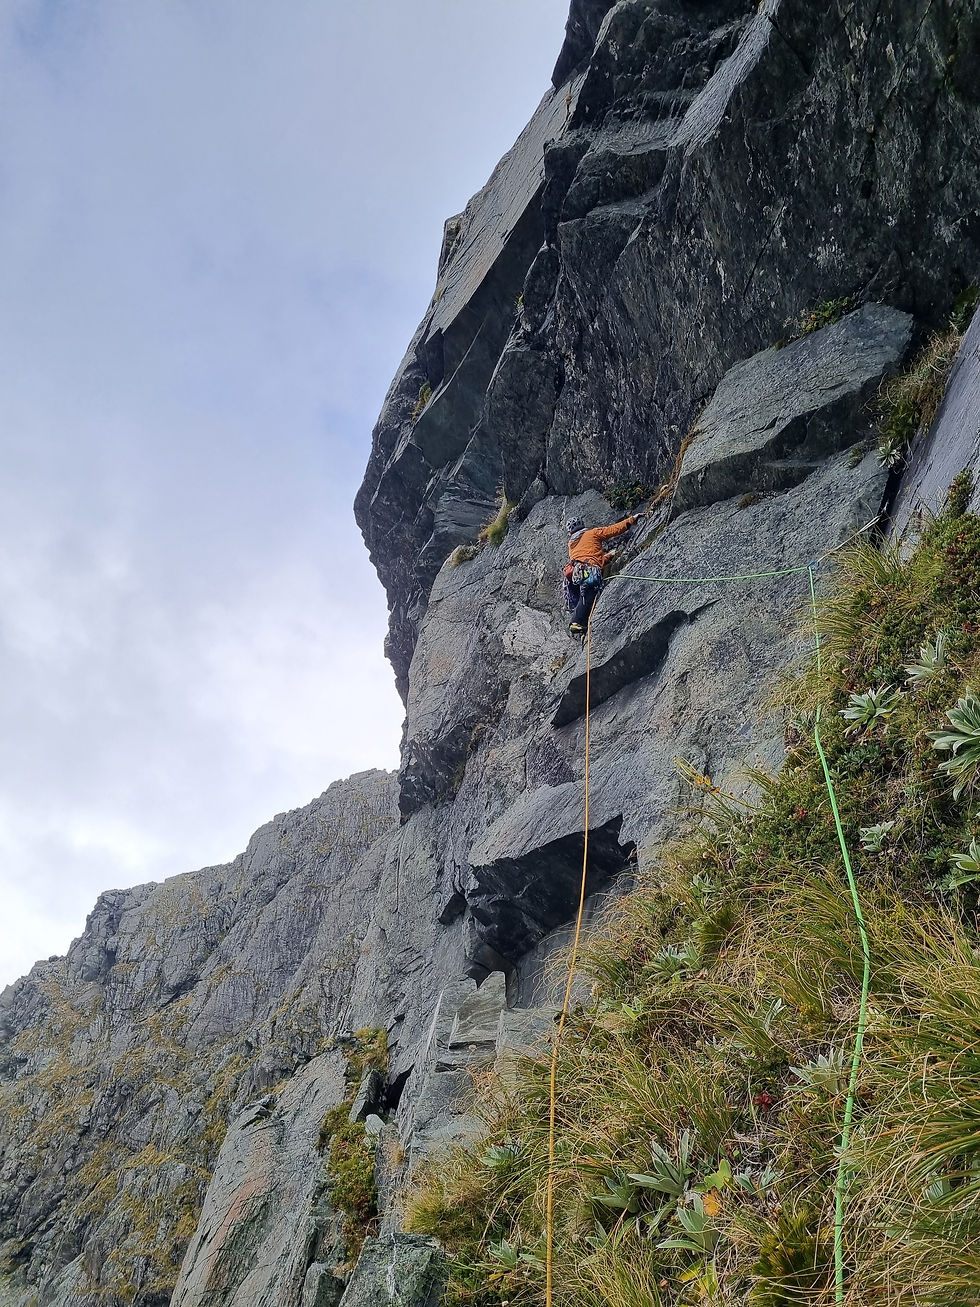
P4 (20, 60m): Outstanding pitch, bit of everything! Navigate a completely blank section of rock, then move straight up to tackle the big off width/chimney. Continue up a further 10m of grassy slabs to reach belay.
P5 (19, 60m): Head left to a #4 placement. Follow with an excellent hand traverse to turn the first roof. Follow up with another crack into the second roof which is turned out left, you will be smiling after that move. Follow a line of weakness on the left to reach anchor on nice big ledge.
P6 – P9 (150m simul Block, 18): We simul climbed the next pitches. Initially back on an easy slab, climb straight up. Reaching a large gravel ledge, we aimed for an obvious off width that split an immaculate slab. I targeted this, as the future line could be bolted on the left face. From here continue into a dark overhanging groove, protect in the crack and climb the face is preferred. Topping this you will arrive at a shallow corner (the next pitch), the anchor is 10m to its right and up.
P10 (16, 60m): An outstanding obvious corner. You will have fun.
P11 (16, 30m): You will be looking up into an immense roof. Move out right initially then climb back left above the belay, fixed piton. Then continue up a slab with an excellent all sizes crack on your right for 10m, then move back left to the edge of the roof. Belay is tucked in here.
P12 (16, 25m) I initially did pitches 12/13 together but rope drag was intense, therefore we bolted an intermediate belay on rappel. This pitch ends when you turn the corner to head back up and right to the summit.
P13 (16, 25m): Follow line of weakness to the top, when the gradient begins to relent the belay in 3m below the ridge crest.
Rappels
We purposefully placed anchors in spots to make it a straightforward descent using 2 60m ropes. The raps are effectively straight down and utilise all the same anchors used on the ascent. However, the route gets its name as no big alpine route can be straight forward. On rappel 9, after accidently dislodging a small block, one of our ropes was severed at the halfway point. This meant for some creativity on the fly, and some additional bolts have been placed mid pitch to accommodate this mishap.
We placed two further rap stations to get down the lower water runnels we soloed. Instead of dropping down too early down the way you came up, instead hold a high traverse. Depending on your nerve, will dictate if you manage to reach the anchor. Two further 60m raps gets you back down on the flat gravel terrace. Alternatively reverse the water runnel, maybe slinging the occasional chockstone.
We arrived back at our bivy 16 hours later at 5am. Managing to get a couple hours of sleep in before the intense rays of the sun beamed in and began roasting us.
Rack
We took a double rack up to #4 and a single #5. It turns out the larger cams were by far the most important and would be placed on most pitches. You could go down to a single #2 and singles of small micro cams (black totem and down).
Single rack of offset nuts.
10 x 60cm draws
2 x 120cm draws
2 x 60m ropes


Enjoy


Comments